
Payment-System Wiring
It’s time for wiring the hardware.
Now that we have chosen our favorite hardware components, it’s time to start fritzing and draw some wiring circuits.
These are the components used, for some details go to this site:
- NodeMCU v1.0 Amica
- AptoFun NFC / RFID Reader PN532
- AZ Delivery 0.96” OLED 128x64 pixel
- DSD Tech HC-05 BLE Module
- Piezo Buzzer
- Breadboard
- some wires
Let’s take a look at the PIN-definition of the NodeMCU v1.0 Amica and determine which PINs to use.
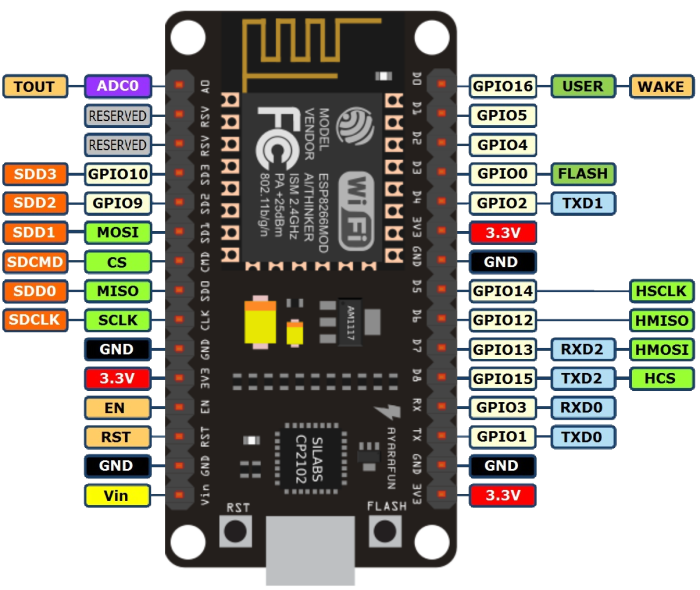
| NodeMCU PIN | GPIO | Function |
|---|---|---|
| D1 | 5 | OLED SDC |
| D2 | 4 | OLED SDA |
| D3 | 0 | BUZZER |
| D5 | 14 | NFC SCK |
| D6 | 12 | NFC MISO |
| D7 | 13 | NFC MOSI |
| D8 | 15 | NFC SS |
| RX | RX | BLE TX |
| TX | TX | BLE RX |
| SD2 | 9 | JURA RX |
| SD3 | 10 | JURA TX |
After we decided which PINs to use we first build our circuit on a breadboard.
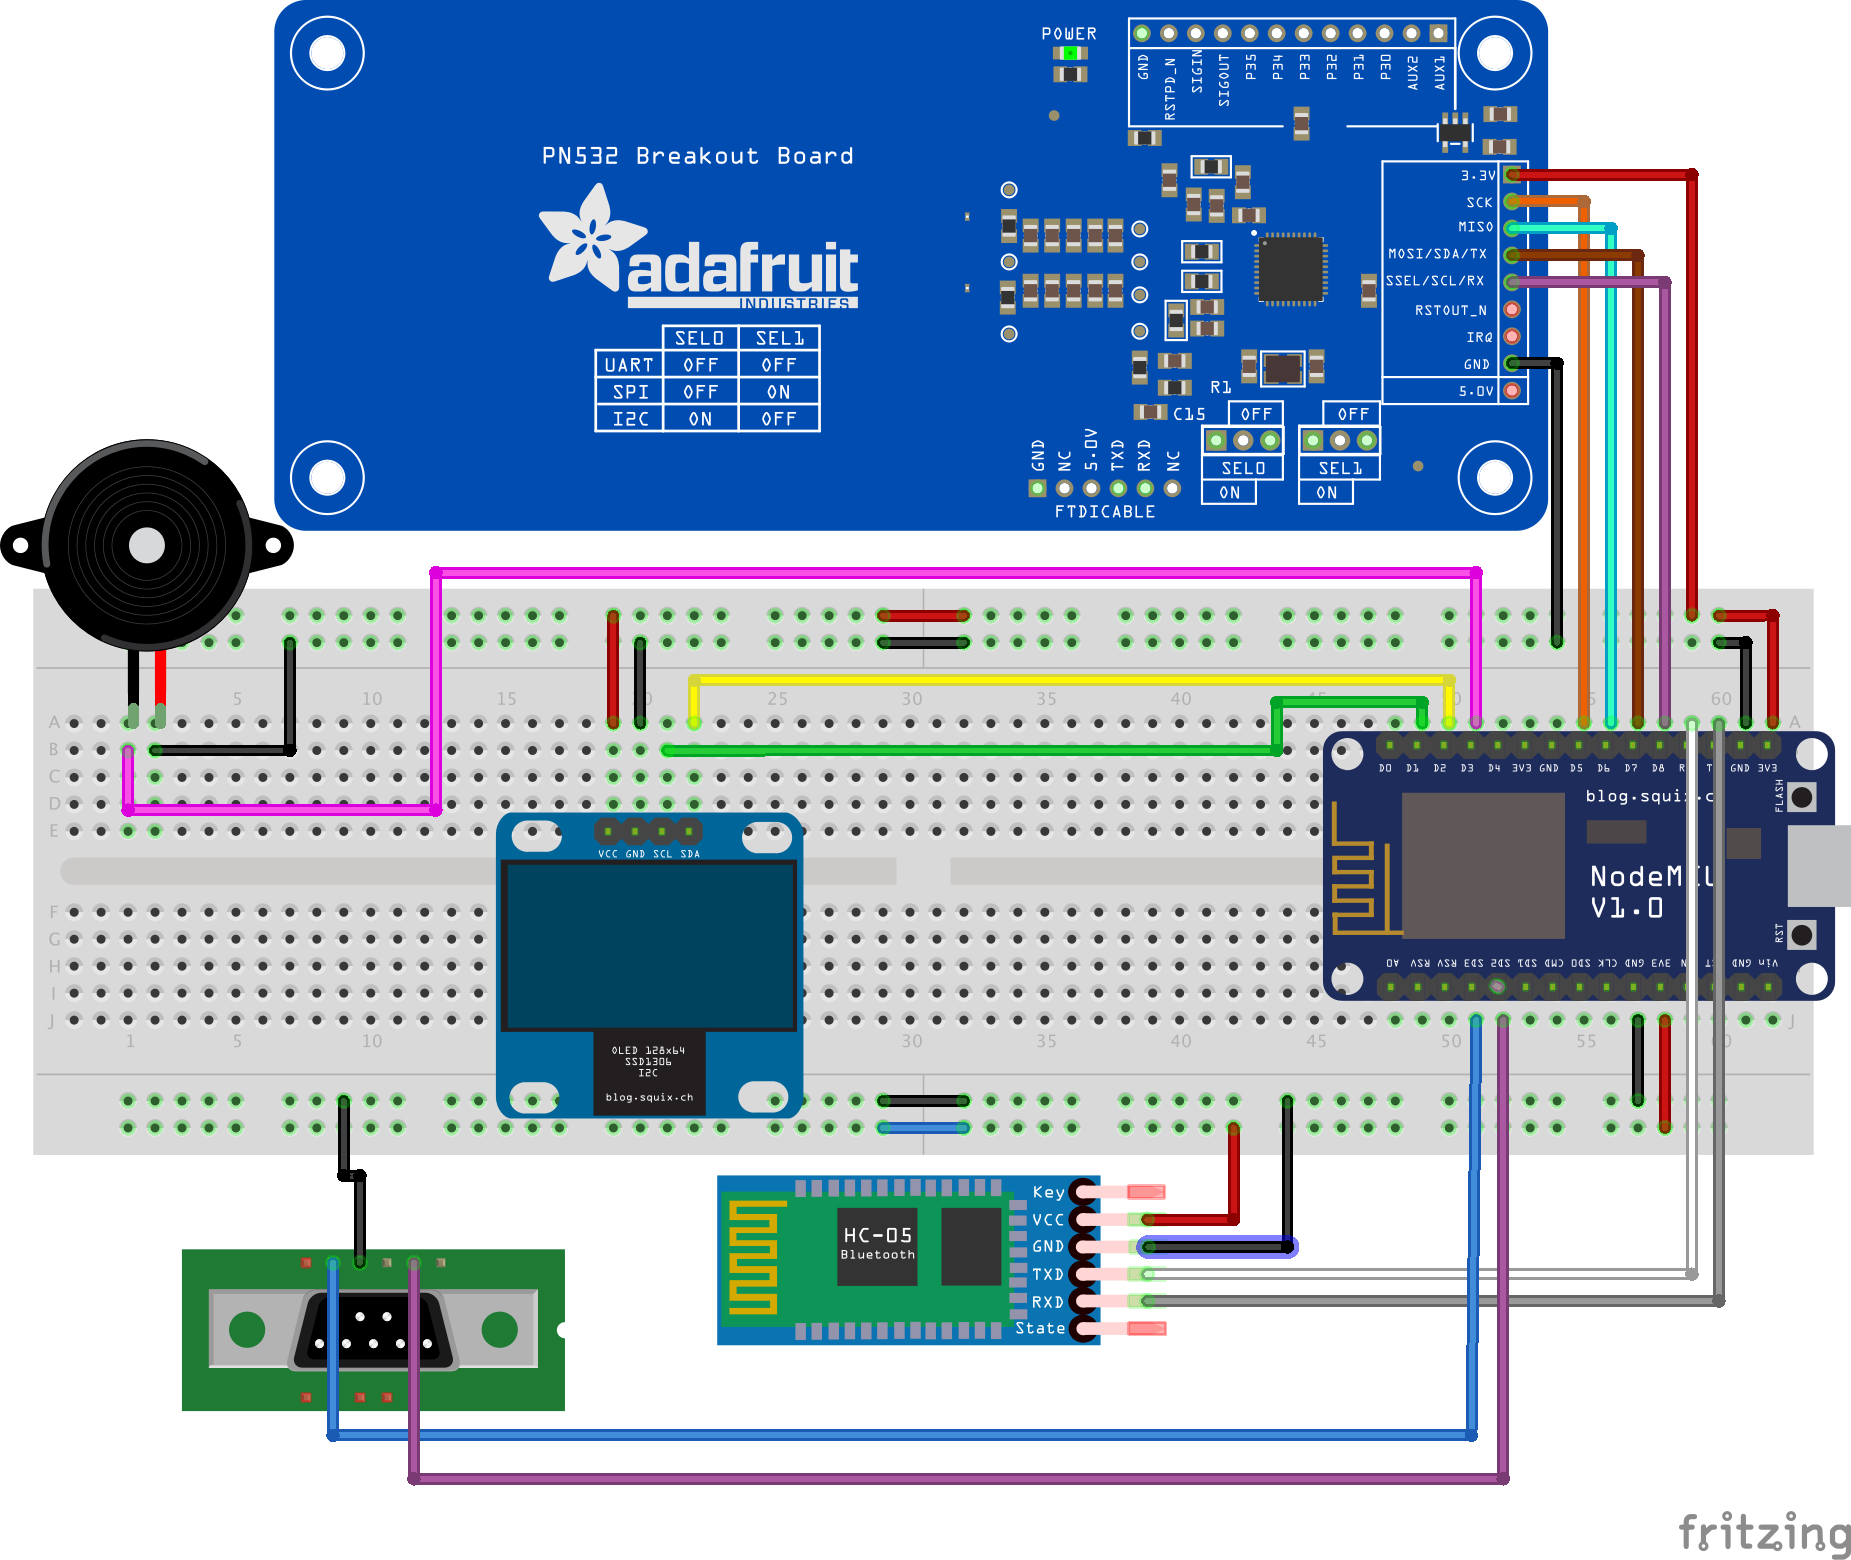
When we have finished building a circuit on a breadboard, we could also draw the wiring diagramm.
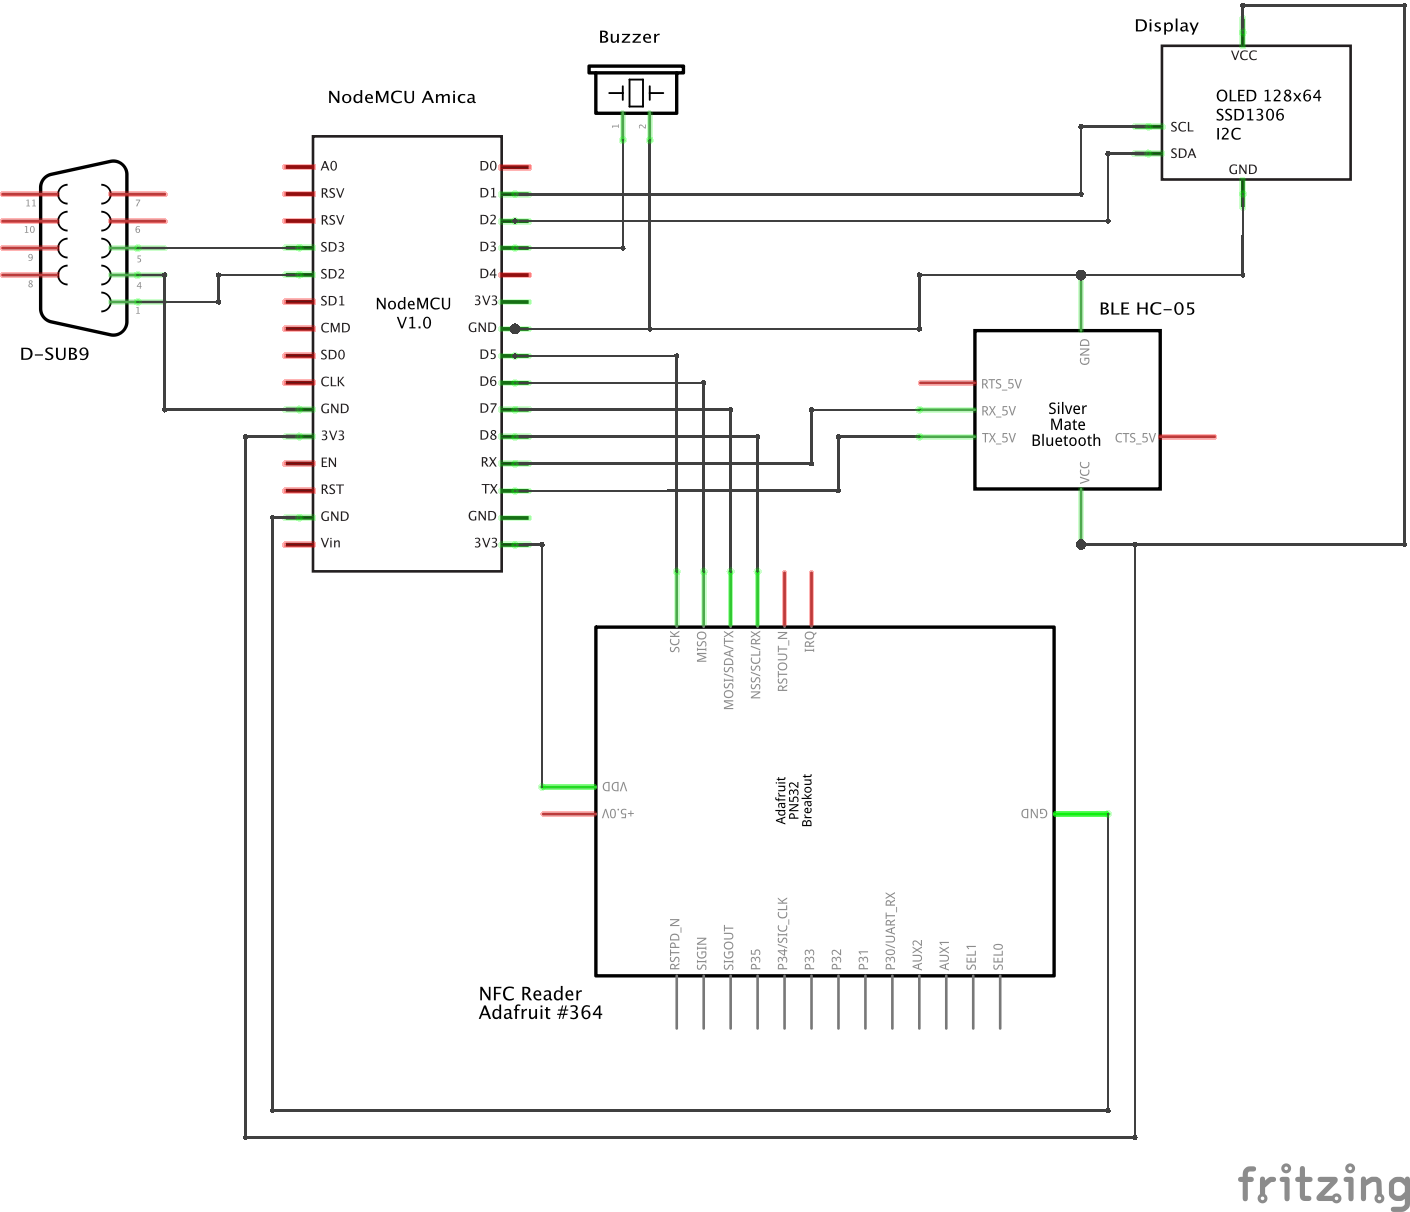
Now we’ve got a working circuit and can start planing an architecture and developing the firmware. Stay tuned…